


How to get a Salon Standard Manicure from Home - Step By Step

We are certainly all missing our local nail salon during lockdown, but this is a great opportunity to save a few pennies, give your nails a breather from harsh gel or acrylic nails and practice perfecting your at home manicure! Not only is it super satisfying completing your own at home manicure, but it can be a great way to unwind and take 10 minutes for yourself. It's also a chance to get creative and practice some chic nail art ideas, there is plenty of inspiration out there for insta-worthy nails.
Patience is key when performing your own at home manicure, to avoid smudging or damaging your natural nails, and practice definitely makes perfect!
Get the right tools for the job
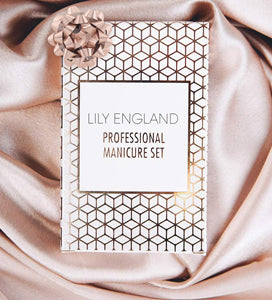
It doesn't have to cost a bomb to stock up on the tools you need for your at home manicure, our pretty and practical manicure set has 5 high quality tools with everything you need to tidy up your cuticles and shape your nails to perfection!
The set includes:
- Curved Nail Scissors
- Double Ended Cuticle Pusher
- Glass Nail File
- Nail Clippers
- Tweezers
Shop the Lily England Manicure Set here
Optional products for your at-home manicure are nail polish remover, cuticle oil, hand cream and your favourite nail polish!

7 Steps to Beautiful Nails
1. Remove all nail polish and wash your hands
Start by removing any old nail polish. If you have gel or shellac, you will want to soak the nails for longer to safely remove all of the colour - resist the urge to pick it off as this will cause damage to your nails! If you are starting with bare nails you can skip this step. Then just wash and dry your hands to remove any oil or residue from the remover. Top tip: soak your nails with warm soapy water for a couple of minutes to soften the cuticles!
2. Trim your nails
Time to trim those worn out nails and get them into shape! Take the curved nail scissors and nail clippers and trim your nails to your desired length, don't worry if they aren't the shape you want yet, we are going to shape them later.
3. Gently push your cuticles back
Use the double ended cuticle tool to gently push back your cuticles, this will help neaten up the nail and allow for a cleaner application when you apply your polish later! Avoid using scissors or cuticle clippers as this can pull and damage your cuticles, these should only be used by professionals - we don't want any injuries here!
4. File to your desired shape
Use the glass nail file to smooth and shape your nails - whether it's round, oval or square you're after! Glass nail files are preferable over traditional emery boards as they will give you a smooth, seamless nail edge and won't damage or break the nail, especially if it is weak after gel removal!
5. Rinse off any dust
This is an important and often forgotten step, but filing your nails creates a lot of dust which can ruin your nail polish application and cause it to look uneven.
6. Apply your favourite nail colour
Whether you love a nude nail or bright, bold colours - this is a way to let your personality shine through your nails. Why not get creative with some nail art, or opt for a more natural look with a classic french manicure? If you prefer to keep your nails bare then you can skip this step.
7. Apply your cuticle cream or oil
This step is especially important after removing gel nails as your nail and cuticle will be weak and dry, but applying a cuticle oil daily is a great way to get healthy, long nails over time. Opt for a product with ingredients such as Vitamin E to add nutrients back into the nail. Just add a small amount and massage into the nails and cuticles to ensure maximum absorption.
